Be The Best, Hire the Best
Every year, businesses in Lubbock try to garner all the votes they can for the title of Best of Lubbock. For more than a decade, the Liggett Law Group has been either a nominee or winner in their selected categories.
This year, Ted Liggett and his team were approached with being title sponsors. Additionally the company hosting this competition was allowing video advertisements in banner ads for the nomination and voting website.
As is often the case when these opportunities are presented to Ted, he had his office reach out to Hamil Bros Studios to produce these videos, since there is no one else in Lubbock they trust with their video production.
This phone call led to a meeting where we would discuss producing the LLG Best of Lubbock 2025 video.
An Unknown Mission
The First Meeting
We weren’t exactly sure what to expect when we were invited to a meeting where we would be informed of all of the details pertaining to this sponsorship video, so, when we signed into the virtual meeting with Ted and Gary from the Liggett Law Group and the representatives from Best of Lubbock, we were a bit surprised that we were sitting on the initial pitch meeting where they would be presenting the title sponsorship of the gala to Ted.
To a degree, I can only imagine that this is what a corporate TimeShare meeting would feel like, but they weren’t trying to sell us on anything, so we listened.
Eventually, we arrived at the sections where video production services would be relevant.
On the Best of Lubbock website, there would be a place for a silent slideshow type video (being produced by Mark Umstot) and there would also be advertising widgets where videos with sound could be used. This is where Hamil Bros Studios would come in.
Finally, a video would be produced to be shown at the gala.
The virtual meeting concluded and we had our marching orders.
The Concept and Location
Asking for Best of Lubbock Votes Without Asking For Votes
Shortly after our initial meeting, we had another meeting with Gary and Ted to discuss logistics for this series of promotional videos.
The first topic was the concept for the content of the videos. We knew they needed to be promotional videos to encourage voters to spend their votes on Liggett Law Group, but we didn’t want to come off like a bad political advertisement where a candidate is begging for votes. This needed to be classy and inviting.
We pitched the idea of recruiting the voices of some of the representatives of the organizations and nonprofits that Ted and LLG have supported over the years. They could easily sing Ted’s praises and ask for votes in an encouraging way, and people would listen.
Ted and Gary immediately approved this approach and we began assembling a list of potential candidates for the video, ending the meeting with a healthy roster of people who would make perfect contributions to this video production.
Setting the Stage: Locating Locations
The next part of the discussion was the need for a filming location. As great a location as the LLG office is, it didn’t seem prudent to set the production at their offices. We wanted a location that would feel neutral while making a visual impact.
Among the names of organizations brought up to be interviewed, CASP (Charles Adams Studio Project) surfaced with recurrence.
Because of the repetition with which CASP was brought up, Jacob had the idea of seeing if we could use a location within the many that CASP offers.
This became the top pick. There was bound to be somewhere between the CASP properties that would suit our needs.
Before long, we made our way down to the 5th and J Gallery in downtown Lubbock, Texas. This was the heart of the LHUCA First Friday Art Trail and seemed to be a great start to our search for the perfect location.
Upon arrival at the 5th and J location, we were met by Chad, from CASP. He gave us a quick tour of the main gallery room and we knew it wouldn’t work. Concrete walls and floors would be an audio nightmare and the entire south facing wall was windows. It would take hours to black all of that out and it would not be economical or efficient.
Not to worry though. There were more locations to scout.
Looking at a few options, the final was the LHUCA Firehouse Theater. We walked in and the hamster in Ross head drank a Red Bull and kicked into over drive.
There was a ton of power, the stage was large, the room was treated for good acoustics, and, best of all, there was a huge projection screen in the back.
By this time, Gary and Ted had arrived to be a part of the hunt for the perfect filming spot.
They joined us in the theater and Ross pitched the idea that made this particular video performance unique: what if we created a looping slideshow of Ted and the Liggett Law Group actually out in the community working with these groups that they have been supporting through the years?
Undoubtedly, there would be plenty of photographic evidence of many of these events. We weren’t wrong. Mark Umstot had years worth of photos and he had already curated a large selection for this the Best of Lubbock website slideshow, so we didn’t have to go through a bunch of photos and curate any of them.
While at the theater, Ted threw out the idea of also shooting some promotional video content for CASP while producing the other video as a way of saying “thank you” for helping with this project.
With the location and the concept now locked in, we were off to the races. Gary worked on securing dates for the video production and we coordinated to make sure it all worked. Then he began the process of rallying our interviewees.
The Best of Lubbock Production
Building the Theater Set
Finally the day arrived when production would commence. We reached the Firehouse Theater and they showed us where we could pull our trailer to load all of our equipment in.
To our pleasant surprise, there was a loading door directly in the back of the stage, meaning we could pull right up and load into a back room, only hauling the necessary equipment to the actual stage.
*As an aside, it was so refreshing to have a proper staging room so we weren’t tripping over cases the whole time.
With the help of Ross’ wife Haley, we began loading all of our equipment into the theater.
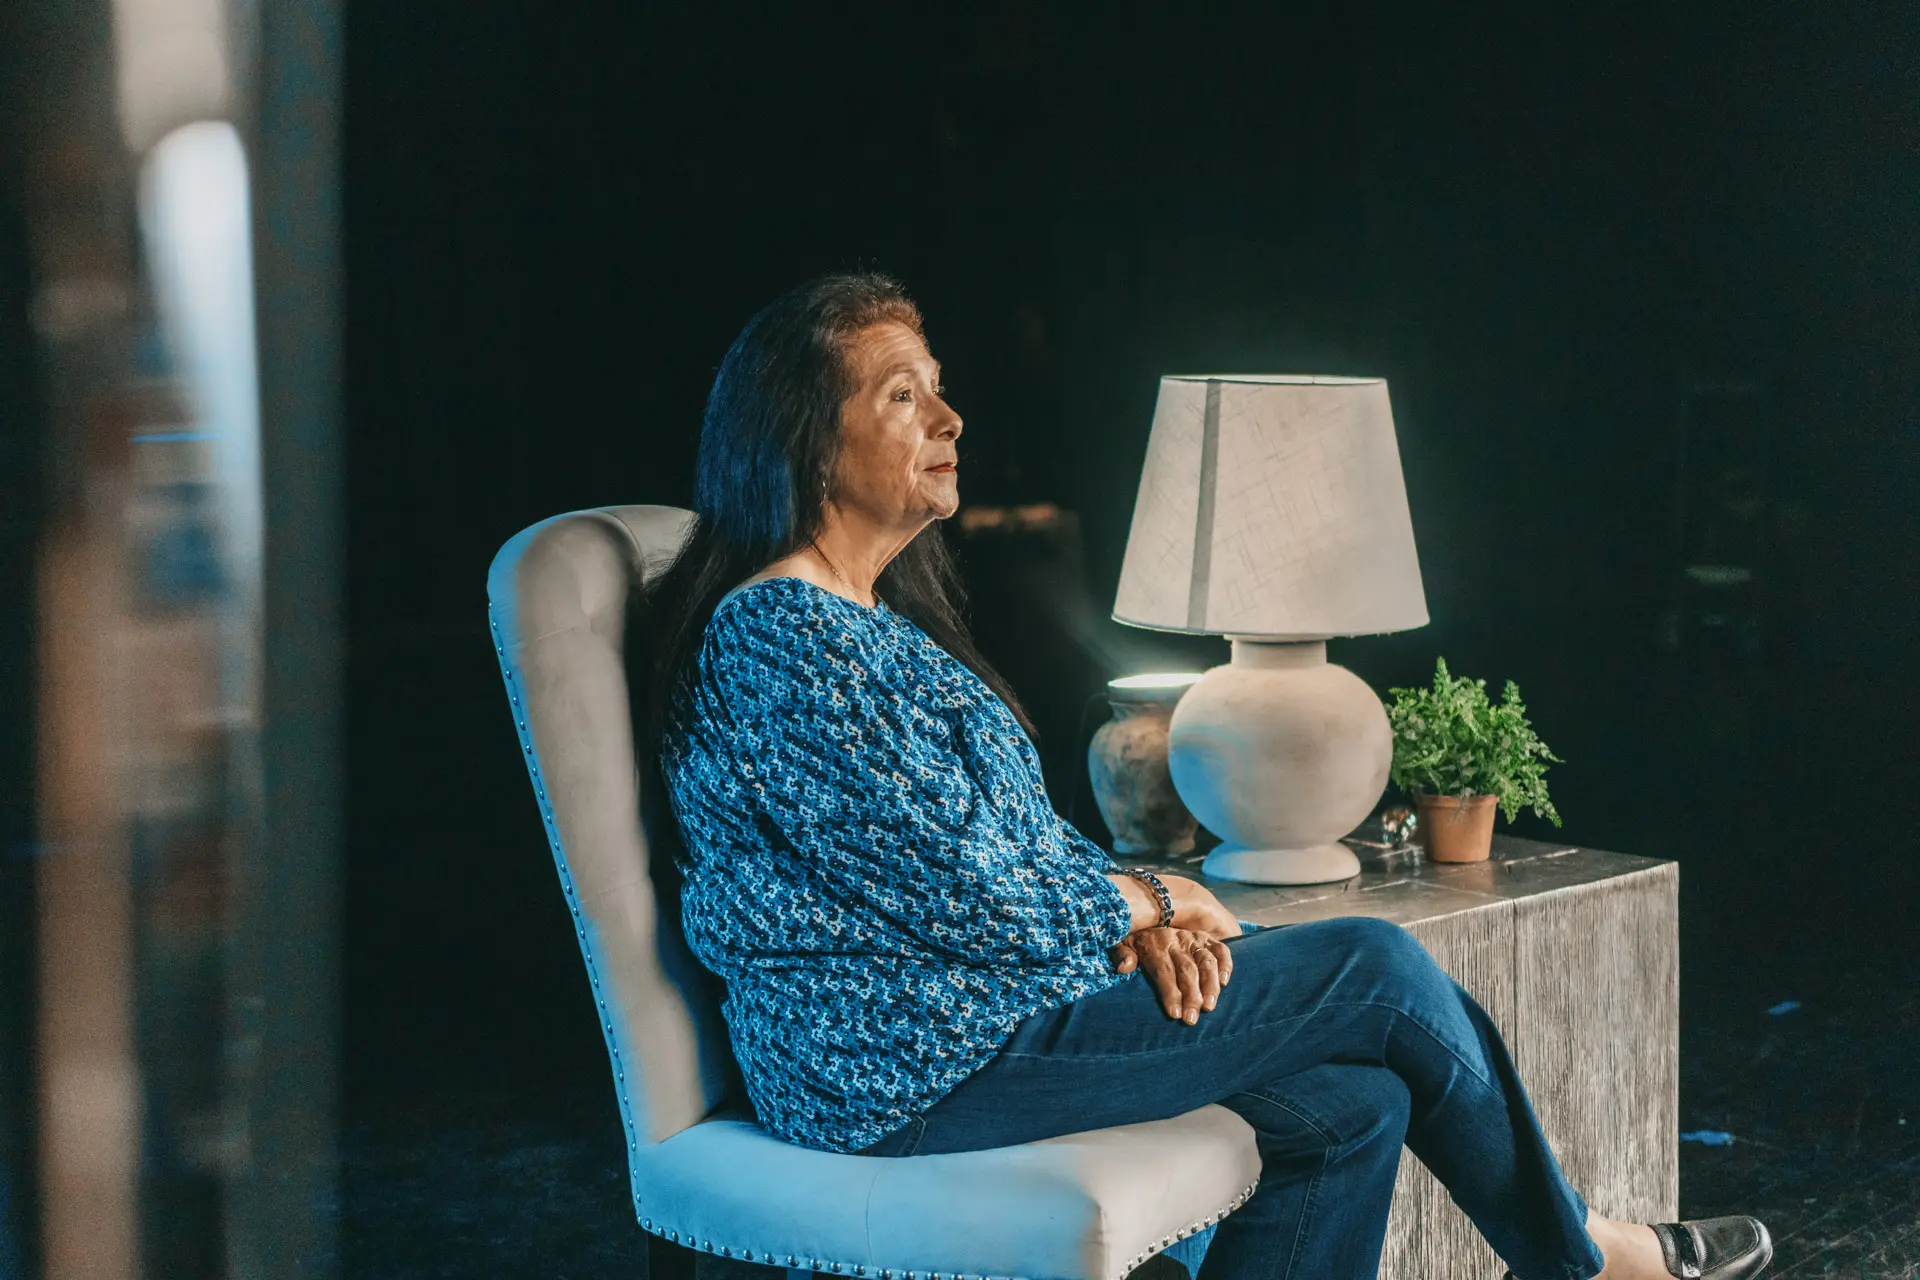
The first order of business was to build our set. While the location was perfect for our needs, we wanted it to have a juxtaposed feeling of homey and theatrical.
Jacob brought a neutral colored dining chair and a distressed silvery side table from his home, and Haley brought a lamp and some small greenery. A bit of home in this theater. It made for a very interesting visual.
We got the chair placed about 50 feet in front of the projection screen and began building our lighting around it.
Once we had a general idea of the placement of our subjects, we began to set up the main camera so we could build the lighting.
The Best of Lubbock Production
Lighting for Success in Lubbock, Texas
We got our main camera built and set about where we wanted it and quickly got to lighting our scene.
Don’t Judge a Book Light by Its Cover
While this setup was technically a 3-point lighting interview setup, it was anything but standard for Hamil Bros Studios.
We don’t usually have the luxury of a lot of space for building larger lighting schematics, so when we do a standard 3-point lighting setup, it’s mostly lights on stands with soft boxes, crammed into a smaller-than-ideal space.
This was not the case in the theater.
For our key light, we got to do something we rarely have the opportunity for: a book light.
For reference, when shooting interviews, we generally want as soft a light source as is possible so there are no harsh shadows on our interviewees’ faces. Typically, we will use a medium to large soft box for this which usually provides a single-diffused light source for our key light.
A book light is a double-diffused light source. While we’re not exactly sure where the term “book light” comes from but, surely*, if you asked 10 people you would get 10 different answers, we know what a book light is. *And don’t call me Shirley
A book light is where you take your hard light source, point it into a bounce source, often a slightly reflective white material, and the reflection off of that is bounced through another diffusing material creating an ultra soft light source.
For this particular book light, we took our Aputure 1200D Pro and mounted it on our Matthews slider stand, which doubles perfectly as a low-sitting light stand. Jacob and Haley took our 8×8’ butterfly frame and mounted it on our two Hollywood combo stands with wheels.
From there, they took our 8×8’ Matthews Matthbounce and rigged it to fill the frame with the white side facing down to be our bounce source.
We wheeled it over to the general area where it would live for the duration of the video production shoot; out of view and camera right.
Tilting it at roughly a 45-degree angle, we attached the second diffusion to it: our Modern Studios 8×8’ half-soft frost. Instead of mounting it to also fill the frame, we attached it only to the top-most 8’ rail (also known as “waterfalling”) so it would hang vertically down, creating a sort of hinge at the top, much in the same way that, if you were to hold a book by one of the cover flaps at a 45-degree angle with the pages pointed at the floor, the other flap would hang vertically. Maybe that’s why they call it a book light…
From there, we placed the 1200D under the Matthbounce, utilizing a wide reflector cone to get the most coverage on the bounce.
The main challenge with a book light is controlling it. Under normal circumstances, we would have to deploy a couple of 4×4’ floppies on c-stands to prevent it from spilling too much on the background. We definitely needed control of this light here since our background was a projection screen and we needed it to be as dark as possible.
Having watched Teenage Mutant Ninja Turtles for most of our lives, we know that a true ninja is a master of his surroundings, and, imagining ourselves as cinema ninjas, the perfect light controlling opportunity presented itself.
What do theaters generally have at the front of the stage? Curtains!
And, these curtains are generally made of flame retardant material that many film lighting modification tools are made from since lighting gets so hot. This theater was no different. We had a huge flag at our disposal and it was already hanging from the ceiling. No floppies and no c-stands needed. We closed the curtain slightly, covering the entire screen side of the book light and our background was back to being blacked out.
Fill ‘Er Up
Next came the fill light.
We took our Aputure 600C Pro RGBWW and placed it on a combo stand directly behind the main camera.
Typically, we use the standard Aputure Light Dome or an Amaran Light Dome Mini on our fill lights, but, since we had the space, we opted for the Aputure Light Dome 150, the largest soft box we own, again trying to lean into as much soft light as possible.
Now, if you’ve been paying attention to the geography of this video production, you may be wondering why we placed the fill light where it would point directly in the direction of the projection screen that we were so diligently trying to prevent light from hitting.
Keeping this in mind, we loaded the softbox with a front-loading egg crate which directed the light to only point in the direction we wanted without too much spill or spread.
We flew the 600C up as high as we could and pointed it down to shine directly down on the focal point of our scene, again, keeping our screen in the dark.
In The Spotlight
The last of our interview lighting setup was our back light. For this, we set up our Amaran 300C RGBWW light on a baby stand and modified it with one of our Amaran Spot Light Minis.
Since the key light is a daylight fixture, we wanted to really cool off our back light, so we set it to a very teal-blue color to give our interviewees a nice calming edge light while also creating a theatrical pool of blue light on the stage floor.
Sitting in the Lamp Light
Remember earlier when we mentioned the set having a lamp and some greenery. Once our interview lighting was fired up and ready, we noticed that something looked awkward. The lamp was dark.
Had this scene been brighter, over all, it wouldn’t have been a major deal, but given how entire background was black (the screen notwithstanding), it was weird having them sit there next to a lamp that was turned off.
Just turn it on, right? Wrong. We didn’t bring any bulbs for the lamp because we had other plans for it. Why didn’t we bring a bulb? Our scene was being lit primarily with daylight sources and the lamp light would have been way too warm, or at least too warm for our tastes.
Our first thought was to bring in one of our Aputure B7c bulb lights. We could set the bulb to whatever temperature we wanted and it would still look like it was coming from the lamp.
The issue with the B7C bulbs is that the way they are designed they look better in a recessed fixture. The top half is the light and the bottom half is the brains, meaning that the light would only shine up through the top of the lamp instead of filling the shade with a full 360-degree throw that most household light bulbs have.
This wouldn’t do. It would look awkward. Then, Jacob had the idea of utilizing an Aputure MC Pro. This is a “credit card light” that we could easily set on something behind the lamp base and shine up into the lamp shade. Since a lamp shade is heavily diffused, you wouldn’t be able to tell that the light was actually coming from under it.
This worked perfectly. We set the light to about 4500k to give the lamp an expected warm temperature without being too warm.
Pre-Screening
The final part to tackle was the slideshow. Ross headed up to the A/V booth, fired up the projector, and got his laptop hooked up.
For some reason, Ross had the foresight to keep the slideshow in Davinci Resolve for playback. This came in very handy when, after starting the slideshow he looked at the camera and saw the white screen was orangish brown.
Definitely not the color we wanted. Racing back up to the booth, he used PixelTools PrimeGrade to white-balance the projector image in real time, getting the whole thing to a much cleaner and natural looking color.


The Hamil Bros Studios Camera Systems
The A Cam
In an atypical roll reversal, our A camera for this shoot was our Blackmagic Cinema 6k Camera paired with a Tokina Cinema Vista 50mm.
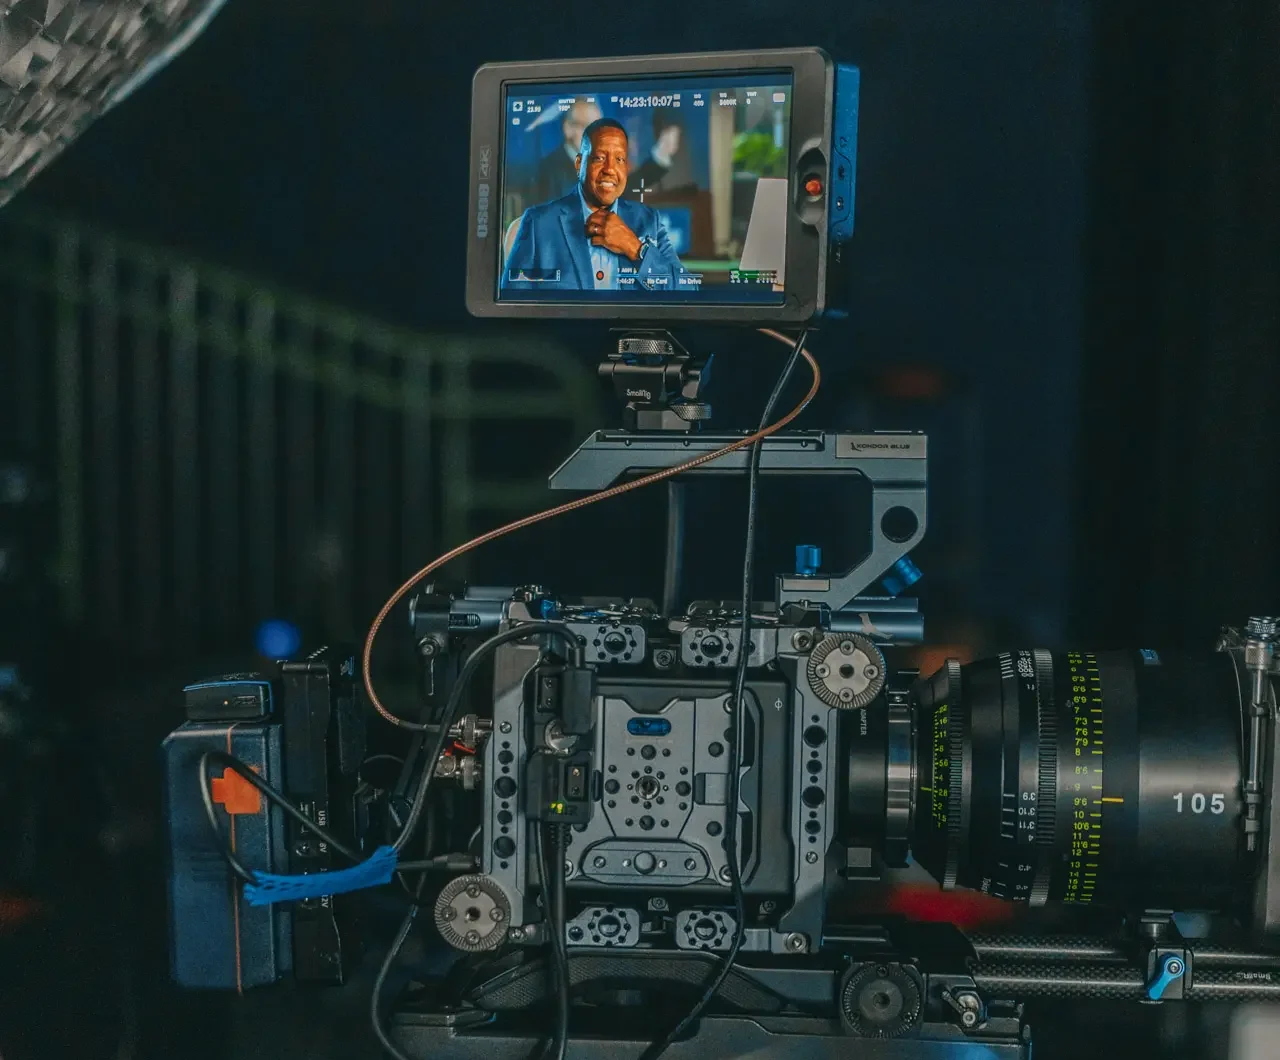
One thing about this shoot is that we got to utilize and test two new pieces of equipment. The first our new OSEE G7 Pro 7” monitor. OSEE had reached out and offered to give us one in exchange for a review.
Having use OSEE monitors for over a year, we jumped at the opportunity. We already had the G7 model and this was a new and improved version (video review available on our youtube channel)
It is touchscreen and quickly becoming our go-to field monitor.
The B Cam
For our B camera, we deployed our Pyxis with the Tokina Cinema Vista 105mm. Built out with our OSEE G7, this camera gave us our close up shot of our interviewees.
Both, A and B cameras were rigged on our Teris tripods.
Why were they both static? We’ll get to that in a moment. We wanted our primary and secondary angles to be clean and reliable in case our third angle had any issues.
The C Cam
Why would this camera have issues? Haven’t you used it before?
Of course, but I didn’t say the camera would have issues, I said the angle might.
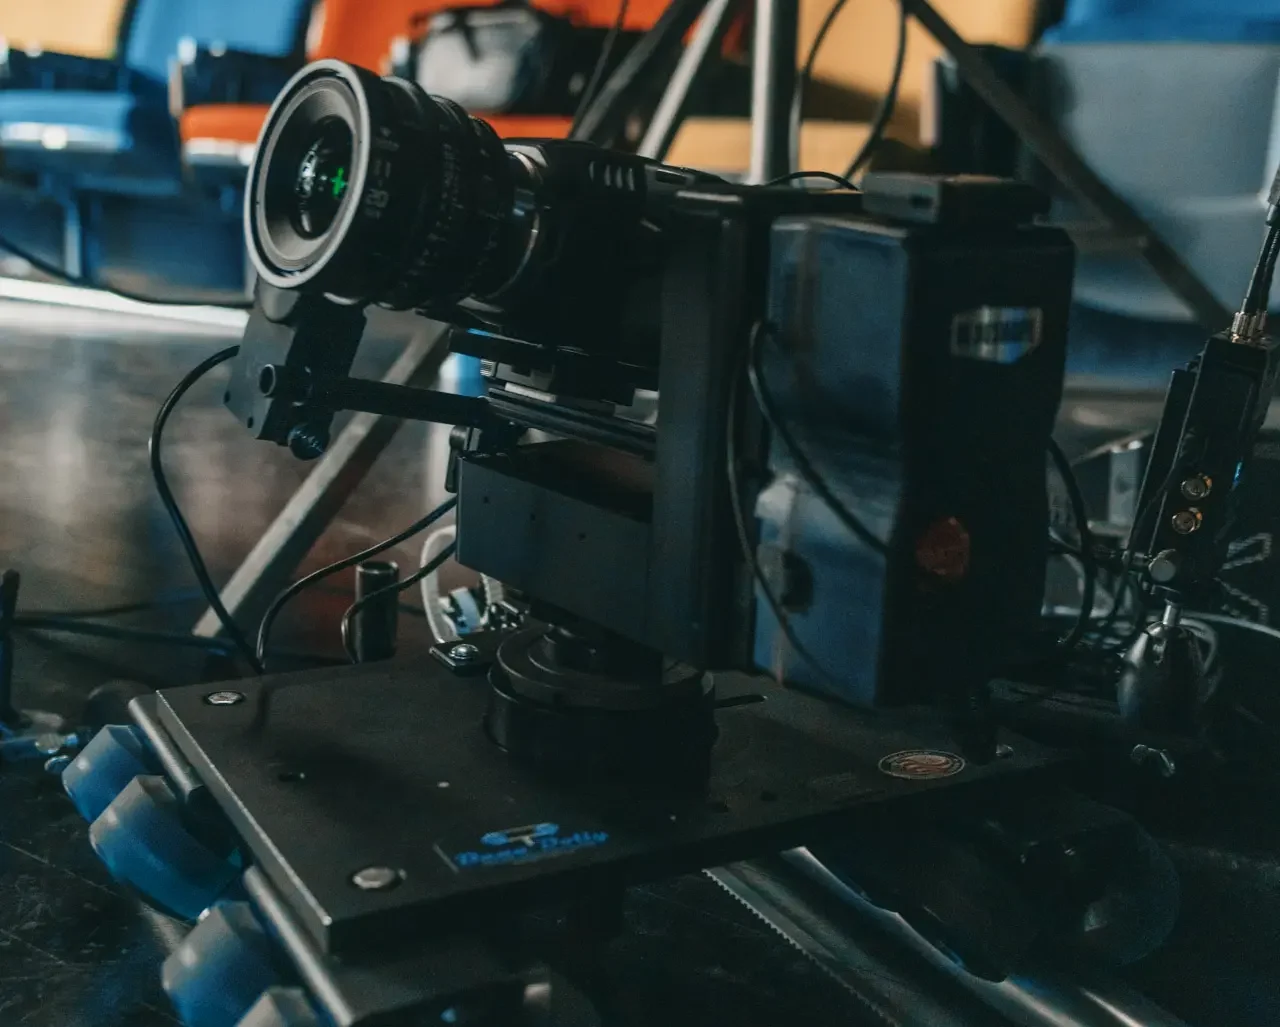
What kind of issues? We didn’t know because we were testing the second piece of new equipment: a beltless motor for our eMotimo ST4.3 and Dana Dolly motion controlled system.
A while back, Brian, at eMotimo reached out and asked if we would like to beta test his new beltless system. One of the things with the current eMotimo setup is that it’s belt-driven and adds time to the build and can add unwanted shake and vibration if not set up properly. Beltless? Sign us right up. So, why would it have issues? It was a beta unit and we were on the beta testing team. As with beta tests, problems can still arise and we didn’t want to be up a creek without a B cam.
Much like our Lubbock Symphony fundraising shoot, we placed the Dana Dolly/eMotimo rig on the floor to give us a grandiose viewpoint of the scene.
We rigged our Blackmagic Pocket 6K camera with our Tokina Cinema 11-20mm wide angle zoom lens and programmed the move.
One of the things Ross wanted was to be able to see the behind-the-scenes equipment in this shot. It added a layer of texture, visually, that made for an interesting angle.
You could see tripods, the key light, the backlight, and we even went as far as to set our microphone-weilding c-stand right in the middle of the camera’s movement path so that the camera spends a few seconds moving behind it.
The Interviews
That afternoon and the following morning, the interviews went off without a hitch.
Given the amount of people there were to interview, we ended up with a ton of incredible content.
From Charles Adams himself, to our good friend, Brett Womble.
All of them spoke about Liggett Law Group’s philanthropic ventures and Ted’s generosity and, at Ted’s behest, many of them spoke about the Charles Adams Studio Project so that they could also get some promotional video content out of this entire production.
Halfway through the second day, it was time to break everything down and vacate the building. We had to be out of there quickly as there was another event scheduled in the theater that evening.
Post Production and Editing
With so much great content from all of our interviews, Jacob had a rough time cutting it all down to something short enough to be able to use. The video could easily have been 30 minutes long.
Nevertheless, Jacob got it done.
One of the perks of using Davinci Resolve as our non-linear editing software is that it now holds the ability for multi-user projects, meaning that Jacob can edit while Ross simultaneously color grades the footage on his own machine, making our post production process much more efficient and not burning work day hours waiting.
Using a combination of PixelTools and Red Giant plugins, Ross quickly took the color checked shots and built the color corrected foundation and rapidly had the color grade put together for all of the interview shots.
This part of the process actually came together quickly and without any revisions aside from a few small spelling errors.
The Final Piece of the Puzzle
Production Part 2: Shooting with Ted Liggett
What? We weren’t finished?
Unfortunately, at the time production was taking place Ted was unable to be there to record his statements.
We ended up having to shoot those several weeks later. However, we wouldn’t be able to secure the same location at the Firehouse Theater.
We wanted to make the shoot look the same so we had to get creative. Fortunately, Raintree Christian Church offered up their TreeHouse room (you may remember that one from the Allstar World Championship Series post earlier).
Using a combination of the black side of our 8×8’ Matthbounce and a couple of black bed sheets, we blacked out the background. We weren’t worried about the slide show for this shoot because we felt it would be awkward for Ted to be seen in front of it and it might come off as arrogant.
Doing our best to replicate the original lighting setup, we had to shrink it down to the 600C with the Light Dome 150 for our key, our 300C with a light dome mini, and a 150C with a spotlight for our backlight.
As we had hoped, this worked perfectly and it cut together seamlessly with the original production.
With the last piece of the puzzle in place, we finished the final project edits and the Liggett Law Group Best of Lubbock 2024 gala video series was completed.


Don't Miss Out on Promoting Your Business
Craft a powerful and effective video for your next gala, fundraiser, or special event. Like the Liggett Law Group, you need a partner who can translate your mission into a visually stunning and impactful story. Our team at Hamil Bros Studios specializes in producing event videos that are not only cinematic, but also inspire your audience to action.
Don’t let your next gala be a missed opportunity to showcase your success. Contact us today to discuss your video needs and discover how we can help you make a lasting impression.


